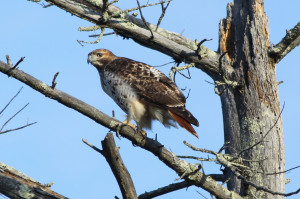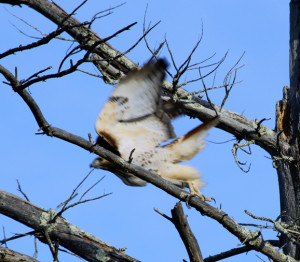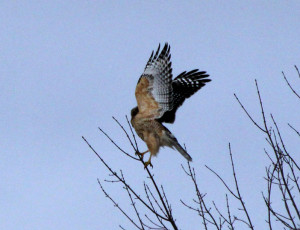
Maine Red Tail Hawk about to take flight. 300mm , f5.6 , 1/320th sec.
Do you wish you could take professional looking photos of birds and wildlife in their natural habitats? If you want to produce better results with your DSLR camera and capture beautiful photographs of Eagles, Hawks, Osprey or even Chickadees and Finches at your feeder, then read on!
It all starts with getting comfortable with your own cameras features, various knobs, dials, menus and settings. It can be a lot to digest all in a single sitting, so try to tackle one feature per photo shoot over the course of a few days. I practiced with my new Canon 60D by taking literally hundreds of snapshots of my Bulldog in the amazing landscape of my living room. It will pay off in many ways. Trust me.
You will begin to notice that your fingers precisely know where to search for this dial or that, and you learn the menus so you can flip to them on the fly. This will all help you to make quicker adjustments in the field to account for various lighting conditions or when you have to make an aperture change to fine tune your depth of field. When you are stalking wildlife you do not want to have to refer to a user manual or else you may miss an opportunity to get that once in a lifetime shot.
Once you are familiar with your camera, you will want to pay particular attention to the “M” setting (on Canon), which is the full manual setting. This allows you to control everything. Shutter speed, f stop (also: aperture), ISO settings, color temperature amongst many others. I have taken thousands of pictures, and can honestly say that I still haven’t explored every option my set up has to offer. But for now we will focus on the settings for the big three which are shutter speed, aperture and ISO. For more a more detailed explanation of the various factors look here.

300mm , f5.6 , 1/320th of a second, ISO 400 Blurry, but note the sky is “clear”

300mm , f5.6 , 1/8000th of a second, ISO 3200 Sharp, but note the “grainy” sky from the higher ISO setting
Birds are fast. And they are instinctive. So you have to be prepared. And you have to be set on a fast shutter speed. I have taken pics at 1/1200of a second and still had blurry wingtips. Under 1/1000 and forget about quality flight pictures. In this range, I find it useful only for shots of birds perched on limb. But as soon as they take off, my subjects become, at times, so blurry you cannot tell what you are looking at. Whenever conditions allow, I always opt for the fast shutter speed I can obtain without sacrificing the quality by shooting at too high an ISO setting.
Next is Aperture. I always keep this set at the lowest possible setting, which is synonymous with the “fastest” setting. This will work great for capturing your subject I motion, and will also help to separate your subject for the fore and background quite nicely by keeping only the bird in focus and blurring the rest out focus.
If you are trying to shoot a larger number of birds in a group on the water, in a flock or perhaps a line of Pigeons on a telephone wire you can open the depth of field by choosing a higher (slower) aperture and this will bring some of the birds in front of and behind the subject in the center. This will cause you to have to choose a slower shutter speed or higher ISO setting to get that optimum exposure that you are after.
Lastly, we will note the ISO setting. I like to shoot with this set to as low as possible, usually in the 100 to 400 range. When I have to I will bump it up to 800, but even at this setting I start to notice some noise introduced into my image, which I do not like. But I rarely have to go that far, usually only resorting that in lower evening light, overcast days or when I am shooting into thicker trees where no sky can be seen within my the frame.
